Easier cycling using electricity, part 3
Peter van der Linden
Trim the rear wheel
We're still not done with the back wheel! The next step is to true the rear wheel, so that the spoke tension is correct, and the wheel is straight.Sit behind the bike where you can see the wheel end on. Spin the wheel and look for side-to-side movement. My motor hub was professionally installed in the wheel by a local bike mechanic at a cost of $120, and so it should have been perfect. It was not. Many of the spokes were loose, and the rim wobbled a coupled of inches from side to side as it rotated.
I could demand the bike mechanic fix his defective work, which would take an argument and an unknown delay. Or I could fix it myself, now, which would take 40 minutes to an hour, and complain to him later. Fixing it myself now was the least amount of work for me. I pulled out the spoke key and got to work.
All the spokes have their head just left or right of the middle of the rim, and they point different ways. Half the spokes go to the cassette side of the hub, and half go to the other side. You true the wheel by tightening or loosening the spokes, to pull the rim one way or another.
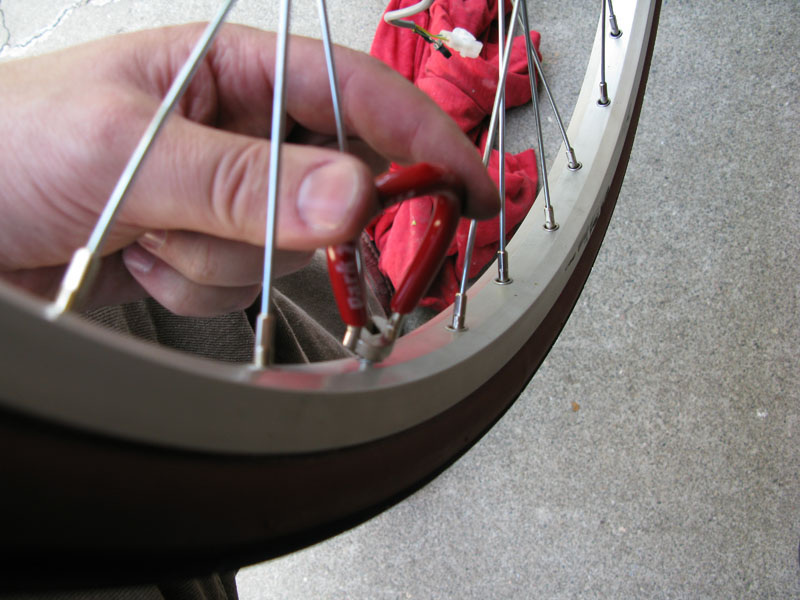
You are striving to get all the spokes with the same tension, and for the wheel to be true. Professionals read spoke tension by plucking a spoke and listening to the note. Real professionals have a spoke tensionometer to measure the tension. See Sheldon Brown for more details on trueing a wheel.
A warning: spoke keys are not intuitive about which direction tightens the spoke. Double check everything!
Adjust the brakes
Now the rear wheel is true, you need to readjust the rear brake to be properly aligned to the wheel. My bike has V-type (direct-pull) cantilever brakes. This is a cantilever without a separate transverse cable. It has two arms, one of which has a housing stop and the other a cable locking bolt. There are two points of adjustment:
- the brake shoes. You want to set these for 5 parameters! Namely,
height, roll angle, pitch angle, yaw angle or "toe in", and
extension (distance from shoe to cantilever arm).
Professional bike mechanics align brakeshoes in about a millesecond by "feel". Holding the shoe between finger and thumb, they give it the right toe-in, and other alignments, then tighten the bolt. - the fiddly screws at the bottom of each arm. These adjust spring tension, and hence how far away from the tire the arm is. After you've got the brake shoes right, make the arms symmetric using the fiddly screws.
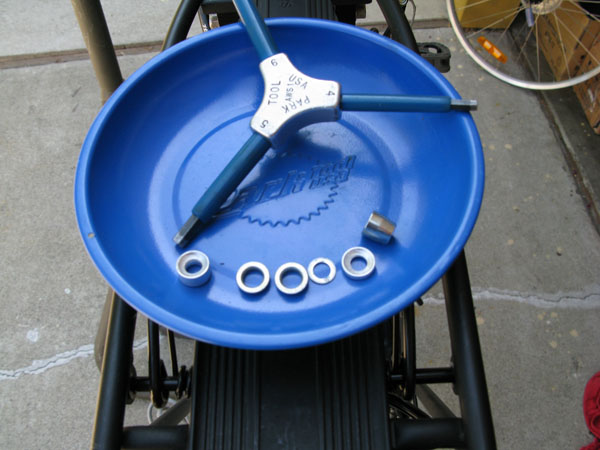
The collection of curved washers that allow for exact brake shoe positioning.
See Brown's site for detailed guidance on V-type brake adjustment. I recommend that you adjust the shoes one at a time, so if you have questions about washer placement, you can refer to the other shoe.
Fitting the Electronics
At last! The part that most people see as "electrifying a bike". This is really the smallest and easiest part of the job.